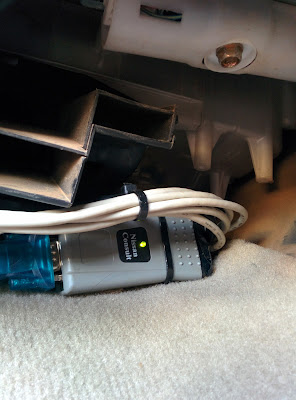
Hello and welcome to post # 15 of my blog on building an in car computer system. Since the last post a few changes have been made. The OS was upgraded once again to windows 10 and I have created a fully functioning ECU reader to integrate into the computer system.
Starting off with the windows upgrade, Getting windows 10 to download onto the computer (an upgrade was used, not the free download when it was released) was relatively straightforward and installing the drivers was no more difficult than when it was upgraded to windows 8.1.
By changing a few registry keys some optimizations were made to windows 10. The key points for optimizing windows for the patrol are as follows:
- Use a local account, not a windows one as all "live" windows accounts require a password to log in each time the PC boots up, which is not ideal for practical use.
- Change registry key settings so the touch keyboard pops up automatically when a text field is touched in a desktop app (Ie when you tap a text box like you would on an iPhone the keyboard pops up)
- Setting up tablet mode for ease of use on bumpy roads
- Changing screen resolution to 720p
- Changing scaling options to make the windows and text bigger and easier to read
Now for the ECU interface. For anyone reading this who doesn't know, ECU stands for Engine Control Unit. It is a miniature computer that interfaces with the diesel engine's electronic fuel pump while simultaneously monitoring a bank of sensors to adjust fuel injection quantity and timing to maintain optimum engine conditions.
The ECU is able to provide real-time output of data such as coolant temperature, turbocharger boost pressure, oil temperature, throttle position ect via a digital output jack and computer interface known as Consult. In addition to providing real-time engine data the ECU also logs any faults and warns the driver by illuminating the orange "check engine" light. Any faults will be saved in the ECU as a code which is also accessible through the Consult interface.
I have been trying to read my Patrol's ECU ever since I bought it and I was not successful for years until I found some scraps of information on a forum that led to me building and prototyping my own ECU interface.
What makes accessing the ECU on the patrol so difficult is that Nissan in its infinite wisdom decided to use their proprietary interface protocols not with their own 14 pin Consult plug which looks like this:
 |
| 14 Pin Nissan consult plug |
But instead with the 16 pin SAE J1962, or more commonly known as OBD2 connector. Using any cheap OBD2 adapter from eBay would result in an error as Nissan consult is not part of the standard protocols that most cheap readers area able to detect.
 |
| 16 Pin OBDII Connector |
In order to build the module I used three components: A Nissan consult reader, an OBD2 cable and an RS232-USB converter. Here are the links to each.
Alternatively this cable might work, and would save a lot of effort in having to adapt the cables.
The ECU reader comes with the 14 pin consult plug, which is useless to me in my vehicle. I used a pinout diagram of the plug similar to this one
 |
| Pinout of the consult plug. All of the pins with labels need to be connected to the car |
along with a multimeter to trace the wires, I labelled the five important ones with tape and a marker.
 |
| Labelling wires from the 14 pin plug |
From there I used this pin out for the 16 pin plug which I can verify to be correct, however it is upside down in relation to the orientation of the plug on my car.
 |
| OBDII Pinout on my Patrol |
The final step was to cut the male end of the OBD2 plug and srip back the wires, then isolate the wires corresponding to the pins in the diagram above and solder them to the interface board plugs. After that I boxed it up and added the USB converter.
 |
| Finished Consult Reader |
To interface the reader to the car I used a free program called ECUTalk.
I have completed the reader and am about the fit it to the car. I will need to fit a USB extension cable from the car down to the driers side footwell then install the software on the computer. In the next post I'll document how I fitted it and got the software working. Until then, goodbye and thanks for reading.


